laborofwonder

Where Whine Meets Wine

Simple and Impressive


For a fantastic dinner, first you start with…

One very delicious margarita.

Next you get the main course going…

Yes, it did taste as good as it looks!

1 whole chicken (3 1/2 to 4 lb)

2 tbs butter, melted

1 tsp salt

1/2 tsp garlic powder

1 tsp ground ginger

1/2 tsp pepper

1 tsp brown sugar

2 tbs soy sauce

1 tbs worcestershire sauce

2 tbs orange muscat wine (you can use 2 tbs frozen orange juice concentrate, thawed)

1. Heat oven to 375. Brush whole chicken with butter; sprinkle with salt, garlic powder, pepper, and half of the ginger (1/2 tsp). Place chicken in shallow roasting pan. 2. Roast chicken uncovered for 30 minutes. Meanwhile, in a small bowl, mix the other half of the ginger (1/2 tsp), brown sugar, soy sauce, worchestershire sauce, and the orange wine. (Don’t forget a sip for yourself, you know, just taste testing.) 3. Remove chicken from oven. Brush mixture over chicken. 4. Return to oven; roast uncovered 20 minutes. Brush remaining mixture over chicken and squash; cover loosely with foil, and roast 30 minutes longer. (Until thermometer reads 180 and legs move easily when lifted or twisted.)

While the main course is going, you get some sides together:

Really yummy ears of corn.

And…

Watermelon, Cantaloupe, and Strawberries. Served with an incredibly delicious cream cheese fruit dip.

And it was fantastic! We’d had so many grey days that I need a meal to make me feel like it was summer- and this did the trick! And I loved it so much that I’ve decided not to wait until Thursday to share it!

1 Comment »

Monkey Bread Madness


Do to my love of all things Pinterest, I have an ever growing list of foods I want to make. Well, after looking through my fridge, I decided on pizza… and then I remembered this. Monkey breadish pizza. (Seriously, the pictures are so good it’s no wonder they’re on pinterest for the rest of us to drool over!)

Looks fantastic, right? Photo Credit: Confections of a Foodie Bride. (You can go there for the original recipe too.)

In the morning, Big E had called one of his uncles asking him if he could come over and play. So just as I was gathering up things for dinner making, I got a phone call asking if I’d mind some visitors for dinner time. And we were so happy they could join us.

photo credit: Biggest E

I will admit that this took a little longer to make than I originally expected. With some organization -or an extra pair of hands- it could be done a lot more seamlessly. Overall, I did find this a great way to use up some leftovers! The original recipe used cubes of mozzarella, and pepperoni. I had neither. I did have shredded mozzerella, bacon, and chicken… all just sitting in my fridge, begging to be used before they went bad.

First things first, though… the pizza dough.

  • 2/3 cup brown rice flour
  • 2/3 cup white rice flour
  • 1 1/3 cup tapioca flour
  • 2 tsp fine sea salt
  • 2 tsp baking powder
  • 2 tsp xantham gum
  • 2 cup water
  • 2 tbs extra-virgin olive oil
  • 2 tsp cider vinegar

Combine the flours, salt, baking powder, and xantham gum in a large bowl. In another bowl, blend the water, olive oil, and vinegar and whisk to mix. Pour the liquid ingredients of the flour mixture. Stir hard, briefly, to make a smooth, soft batter. Occasionally, I have to add a little more flour to get the batter so that it holds it’s shape. If more flour is necessary, I use tapioca flour, and add it in a tbs at a time.

Step Two

  • 4 tbs butter
  • 2 cloves garlic, finely chopped
  • 6 oz mozzarella cheese
  • 1 cup shredded/chopped chicken
  • 1/4-1/2 package bacon
  • 3 cups marinara sauce, for dipping

Heat garlic and butter over medium heat just until the garlic begins to brown. Remove from heat and let sit. Lightly brush the inside of a bundt pan  with garlic butter. Pull off large marble-sized balls of dough and flatten- trying to stay consistent with the size. Top with a sprinkling of mozzarella cheese (I used shredded but you could certainly use cubes. Might be easier to seal with cubes instead of shredded.), chicken, and bacon. Wrap the dough around the toppings, pinching well to seal. Very lightly brush the pizza ball with garlic butter and place into the bundt pan. Repeat until all of the dough is used. Cover and let sit for 30 minutes, while preheating the oven to 400 degrees. Bake for 30-40 minutes, until the top is very brown. Remove from the oven and let sit for 10 minutes. Turn out onto a platter and serve with warmed marinara sauce for dipping.

Not a terrific picture, but you get the idea.

These were so good… super filled. And they went fast.

Ok, so I have a confession- the photos, and story, are actually from December… but for some reason I never posted. So, today seemed like perfect day to get back in the foodie saddle! Because a)it’s cold and grey out today, which makes me think about warm, yummy food. And b) my 3 little ones are all cuddled in a blanket together on the couch. Their being so sweet I’m a little worried they’re plotting something. Seriously, they’re all snuggled in, sharing a blanket and pillow. Giving each other hugs and occasional kisses on each others’ cheeks. So I’m going to be spending time soaking all this sweetness in.)

*I just wanted to add that I made this recipe again tonight and it was even better than I remembered. Biggest and Miss helped me, and I’m not sure if they added more water/oil or what, but I did end up adding about a full cup extra of GF all-purpose flour before I could actually get it to be the consistency I needed. But they weren’t too dense or too floury or anything. They were perfect. That said… after hubby helped himself to them right out of the pan (hence no new, great photos), I discovered the bottom layer ones were not cooked through all the way- they were still a little doughy, so I threw them in for about 5 more minutes. I just didn’t want anyone trying this out and feel like I sold ’em a bag of worms! (Because that would be just gross)

8 Comments »

Simply Comforting


I’ve seen a lot of other blogs recently featuring their favorite comfort foods. I even did a chicken noodle soup one. While this one isn’t so terribly different. It’s good enough that you’re going to want to try it. And for a limited time only, I will offer you two recipes for the price of one.

Bacon Chicken and Dumplings and how to make your own, homemade version of bisquick.

One of my favorite cooking companions. My sweet little Sous Chef!

Bacon Chicken and Dumplings (adapted from Allrecipes.com)

3 slices of bacon

3 large potatoes, peeled and diced

1 onion, diced

4 skinless, boneless chicken breasts diced*

3 cups chicken broth

1 tsp poultry seasoning

salt and pepper (to taste)

1 can whole kernel corn (drained and rinsed)

2 cups half-and-half**

1 1/2 cups biscuit mix

1 cup milk

*I used 4 because I wanted it extra chicken-y, and of course the eternal problem where hubbyman doesn’t like soup.

**I used whole milk (because that’s what I had).

***You could add in more vegetables. If I’d of thought about it, I would’ve at least added some of the carrots sitting in my fridge.

1. Place bacon in large, deep skillet. Cook over med-high heat until evenly brown. Drain, crumble, and set aside; reserve bacon drippings in skillet. (I didn’t have any bacon thawed, but I thought it sounded so good. I did have some bacon drippings, so I did use that. But I will be using the bacon next time.)

2. Add potatoes, onion, and chicken to bacon drippings and cook for 15 minutes, stirring occasionally. Pour in chicken broth; season with poultry seasoning (here’s what my poultry seasoning has in it: marjoram, parsley, sage, thyme, rosemary, onion powder, and savory), salt, and pepper. Stir in corn, and simmer everything together for about 15 minutes.  *

3. Pour in milk (or half-and-half) and bring to a boil; add crumbled bacon. In a med. bowl, combine biscuit mix with milk and mix well (dough should be thick). Drop tablespoon sizes of dough into boiling mixture; reduce head and simmer for 10 minutes (uncovered) and then another 10 (covered). Avoid stirring while it’s simmers, or the dumplings could break apart.

*It was during this time (the 15 min simmer) that I whipped up the homemade version of bisquick, so by the time the simmer was done, so was the mix.

(image credit: AllRecipes.com) I couldn't find my camera so I didn't get any pictures. But it looked and tasted wonderful!

Homemade Bisquick Mix

 6 cups all-purpose flour, sifted *

3 tbs baking powder

1 tbs salt

1/2 cup cold butter

*I used Tom Sawyer all-purpose gluten free flour (it’s my favorite) but I’m hoping to come up with my own blend

1. In a med. bowl, measure and sift flour, baking powder, and salt. Use a wire whisk to make sure it’s blended thoroughly.

2. With a pastry cutter (or something similar – I actually used a cheese grater to “grate” the butter), cut in butter until it’s fully incorporated.

3. Store in the fridge, in an airtight container, for up to 4 months.

You can use this in place of bisquick. We’ve made pancakes, snickerdoodles (My Aunt said she actully preferred my gluten free version!), and biscuits out of the mix. It’s fantastic. And, in my opinion, even better than the box. Also- it’s way cheaper. So there you have it folks!

5 Comments »

Simply Sick


The last time I was sick (and of course a couple of the kids were as well), all I could think of was how I wanted some good, old fashioned, homemade chicken noodle soup. Of course, the last thing I wanted to do while I was sick was to make anything. And being gluten free, we can’t really just grab any old can. And the can of gluten-free, chicken noodle soup at the grocery store is over 4 dollars. For one little can. If I were desperate, I might pay that. But under normal circumstances, no way. That’s ridiculous.

So this last week,  my MissE had a day where we worried she was getting sick. I figured it was perfect timing to try my hand at making some soup! Even if she wasn’t sick; I could at least freeze some, so there’d always be some on hand for if when someone got sick. As any parent can tell you, when your kid is sick, you don’t get a lot of free time. Usually they’re in arms, or on lap, or both. Even when sleeping. So as I looked through countless recipes, I knew I needed something I could throw together quickly and relatively easily. Enter my beloved crock pot. (You know I recently read a “de-cluttering” article, and they actually said to *whispers* throw away your crock pot, because nobody ever uses them! *gasp* Oh the blasphemy! *More whispering* Don’t work ‘crock, I’ll never let you goeither of you.) I love crock pot recipes, they’re easy, they’re time saving, they’re not a don’t-stand-there-and-watch-the-water-boil-or-it-never-will type of recipe. Which for me, is terrific.

So in true form, I scanned through about 20 different crock pot chicken noodle recipes… and then did something of my own accord. (I just can’t help it! And you shouldn’t either! Why should you waste timing making something how someone else would prefer it? No way! Make it how YOU would!)

In the crock pot

Ingredients:

4 cups chicken broth

4 cups chicken stock

3/4 cup onion, chopped

1 garlic clove, minced

2 bay leaves

1/2 tsp dried thyme

1/2 tsp fresh ground pepper (do this to taste. I might have used more as we like pepper in this house.)

1/2 tsp basil

1/2 tsp garlic salt (my garlic salt has parsley in it. If you don’t have garlic salt, just add salt to taste.)

4 chicken breasts

at least 3 cups noodles, uncooked. (I really wanted to make my super yummy, taste like the chicken noodle soup noodles, but I didn’t have eggs. So I just used a -whole- bag of rice noodles. They worked perfectly.)

In crock pot/slow-cooker (whatever terminology you prefer),  combine chicken broth and stock, carrots, onion, garlic, bay leaves, thyme, pepper, basic, garlic salt/salt/lowry’s (again, whatever you have/prefer). Place chicken on top of vegetables. Cover crock pot with lid and cook either on low for 8-10 hours or high for 4-5 hours (I used this option, and prefer this option, because I don’t normally decide on dinner until just before lunch).

After cooking, take chicken out and put it on a cutting board. Also take out and toss the bay leaves. Add the noodles to the crock pot and put the lid back on and cook on low for about 20 minutes. While the noodles are cooking, shred the chicken (with a fork!). Return chicken to soup and serve!

*NOTE: You can also add celery, but I don’t love it in my soup (and my kids deem celery only acceptable with peanut butter on it) and I didn’t have any, so I went with what I did!  You can also use a whole -roasting- chicken (about 3 1/2 pounds). If you do, then you’ll want to remove the skin and fat and bones before shredding (obviously. I know you know this, but I’m sayin’ it anyway.) And after that you’ll want to skim fat from the soup and discard that. With the chicken breasts I used, they were very lean to begin with, so I didn’t really have the fat to skim off the top.  And you can of course use your favorite egg noodle that’s gluten-filled. And about the broth/stock. Hubbyman is not into soup. He always looks dejected whenever he looks in the pot and finds it filled with soup. Which is unfortunate considering that my girl and I love soup. And the little boys are always at least willing to eat it. So sometimes I just go ahead and make soup, even though hubby won’t be thrilled with dinner. Some recipes called for 8 cups of water (if you were cooking with a whole chicken) and some called for 4 cups water and 4 cups chicken broth. I wanted the stock for both the flavor and the consistency. And it turned out perfectly.

Hubbyman is not a huge soup fan. So I made his less soup-ish and mine more so!


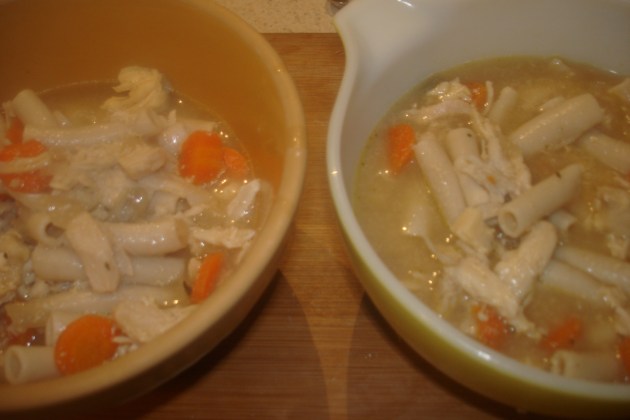
Both hubbyman and I determined that this was the best chicken soup we’d ever had. So, so yummy. There was enough for leftovers and to freeze. It was still hot so I put it in the freezer container and put in the fridge until it was cooled through before freezing (nothing worse than freezer burn!). And it got eaten. By my non-soup-loving husband. I should note that with the stock it does change consistency after being cooled. (plus that and the rice noodles started to fall apart, just a little) So then it was more like another one of my favorite- chicken and dumplings. Either way, it was delicious. I will definitely be making this again. Especially since hubbyman gave him approval to add this to the list of regulars. So easy, so good. It’s a win for me!

mine (more broth-y)

with garlic biscuits

less broth-y


6 Comments »

Simply Impressive


Ok, I have a confession to make…while I don’t normally loooove lots of fried food, there is one thing I’m addicted to. (Or at least one that I’m willing to admit to!)  Onion rings. A week or two ago, hubbyman came home from a boys’ night out and was famished, so we looked through the cupboards and the fridge, deciding what to make. Then he looked at me with those blue puppy-dog eyes and asked that I make him some breaded chicken and onion rings… thankfully, he was willing to help! I made them again last Friday because they were just that good!! In fact, last week hubbyman dubbed them “the best he’d ever had.” And those are big words from him! I even bought some more huuuuge onions this week so that I could make them again! I’m also thinking mozzerella sticks… but all this fryin’ just seems not so healthy. But when paired with the fact that we normally don’t eat it very often and the rest of what we normally eat is really healthy… I’ve decided I’m not going to feel guilty about it! I will warn you… they’re so good they’re definitely habit forming! I may look into a way to bake them instead of fry them, so they’re a little healthier. But I just love the flavor and taste and crunch!

I’ve tried many different things to make batter to fry in, but so far, this has been the best, I think. It’s really pretty hard to make a bad batter though (in my opinion)… so if you interchange a different flour, it’ll probably turn out fine.  Just keep in mind that different flours (like almond meal) may brown faster or slower than all-purpose, so just keep an eye on it.

Ingredients:

  • 2 lg sweet onions
  • 1 1/4 cup all-purpose flour (I used GF)
  • 1 tsp baking powder
  • 1 tsp salt
  • 1 egg
  • 1 cup milk, as needed (my first batch i needed the full cup, the 2nd I didn’t. Pour in by 1/4 cup)
  • Seasoned salt to taste (I used Lowry’s)
  • 1/4 tsp pepper
  • 1 qt. oil for frying, or as needed (I used half veg/half olive)
Heat oil to about 350 degrees. Cut the onions into strips/rings about 1/2 inch thick, and set aside. In a bowl, mix together the flour, baking powder, and salt. Next, coat the onion slices in the flour mixture. Whisk the egg and milk into the flour mixture. Dip the floured rings into the batter to coat. Set on wire rack (I used a cookie rack with a cookie sheet underneath for easy clean up) until batter stops dripping.

Deep fry, a few at a time, for about 3 minutes, or until golden brown. Remove and place on paper towels to drain. Season with seasoning salt and serve!! Yum! And then to make the breaded chicken I did the same process, exactly the same, with the exception of cooking/frying it for about 3-3 1/2 minutes. (Make sure to cut one at the widest to make sure it’s done! If not, add more time to your batches, if it’s done, continue on!) They were sooo, sooo yummy. When I make these, I normally make enough of them to freeze half, but my children ate soooo many of them, there was enough for next day leftovers, but that was it! Did I mention that next time I want to try making mozzarella sticks?? (I’d use the same recipe!) They are a favorite of mine! Friday’s are kind of our make something super yummy night and I look forward to it every week! And I have a great idea for tomorrow….and I’ve already bought the onions!

I like this one, because one of the chicken pieces looks like a peace sign!

3 Comments »

Impressively Simple Leftovers


Last weekend was craazy, followed by what’s been a fairly crazy week. Tuesday our power went out! And it didn’t get fixed until around 3:30pm yesterday! While it was a major annoyance, it wasn’t life stopping that’s for sure. Big E found his “miner’s light” (one of those flashlights that goes around your head) and Miss E has a Princess lantern (I believe both are thanks to an Auntie- thank you!) and they had lots of fun with those. They even put on a shadow puppet show for Littlest E. So sweet. Plus, since it was dark they were convinced it was bedtime almost an hour before their normal bedtime… that was awesome! And it afforded us to do some things that I otherwise would have declared myself too “busy” to do. Like walking to a lovely little cafe we like and sitting in their garden area while enjoying Yogurt Parfaits (which Big E deemed “better than candy,” and Miss E followed it with, “Or treats!” thanks in part to the shaved chocolate on top!). The older couple sitting a table away had a good chuckle over their statements. Followed up with playtime at their favorite playground. Something it’s been either too hot or rainy to do very often this summer. I think they were actually a little disappointed when the power came back on. Not much, but maybe a little. Until they realized their toast could again be toasted.

So food… leftovers, of course! Because I threw out everything that was a)going bad or b) had already gone bad or c)would never get eaten and was not worth taking up precious cooler space. I try (this is a continuous process for me!) to make sure everything continues to get eaten, not just one time and the rest thrown away… and what better reminder than a mandatory fridge cleanout! I found pre-made (and frozen) noodles, already cooked chicken, and a small container of pre-mixed-GF all-purpose flour…. so I made chicken alfredo! Yummy! The noodles are incredibly easy to make, alfredo sauce is super simple to make (and so easy to personalize into whatever your taste buds are craving most! For me it’s usually salt, for hubbyman it’s usually pepper! Bring 1 cup milk, 2 tbs butter, 2 tbs flour, and any of your favorite seasoning- I used garlic, lowry’s, pepper, sea salt, parsley, and oregano. to a boil for 2 minutes and voila- instant Mmmm.)… so that’s what we ate! What is your favorite, easy to throw together, “leftover” meal? Mine is probably salads, because I just love salads and you can throw almost any kind of (leftover) meat on top and make it especially “special.”

Leave a comment »

Impressively Simple


This week has been caarraaayyyzzzzyyyy! Sunday we had Miss E’s 3rd birthday party! Filled with little girls, family, and friends, and one totally overwhelmed-with-being-surrounded-by-girls Big E. I’d call the day a success. Monday I was just relaxing and letting the kids enjoy just some peace and quiet after the week of preparing for the party, along with the party itself, when I received a call from my grandmother about my mother. So, my sweet and supportive hubbyman came home and stayed with ALL of our children (and even did some cleaning!) while I picked up one of my brothers, picked up my dad from the airport, and then spent the rest of the day at the hospital with my siblings and parents while my mom underwent an angiogram (we thought an angioplasty was likely, but happy surprise- it wasn’t necessary!). By the time I woke up on Tuesday (after a late night decompressing all my feelings about the day and my feelings over my mom’s mortality) feeling: blah. More than blah, I’d been battling my allergies for over a week, and was feeling run down, headachey (I’ve had several migraines this past week), and like crawling in bed for the next few days. We also had company coming and by the time I felt really miserable, we had only an hour before their arrival. So I took some Ibuprofen and that relieved my headache and the achy-ness enough that I was able to enjoy our evening. (Hurray for another couple with kids! And they have a boy Big E’s age and a girl Miss E’s age!! And Miss E actually climbed out of my lap and played with the kids- the whole time! This is a HUGE development in the land of Miss E, as she is usually painfully shy.) After another late night, though, I was totally spent and felt completely miserable on Wednesday. (Boo!) And we ran out of kleenex before my first cup of coffee. In fact, I felt so crappy that I didn’t even care if I got to the cup of coffee!! (*collective gasp*  know, right?!) I did throw the kids in the stroller for a trip to the grocery store for the makings of my “feel better meal” and kleenex. It was painful. And I got home, only to realize that I had forgotten to get kleenex. I almost cried. Anyhow,  I spent the next couple hours cuddled up on the couch while the kids played around me.

If you’re wondering why this doesn’t feel like a recipe post… well, you’re right. Kind of. Where I’m going with this was that afterwards, I made the meal that I tend to make if I’m not feeling the greatest (or if I’m just in need of a little comfort). Most people think chicken noodle when they’re under the weather. And if I’m really sick, I would probably agree. But if you’re just under the weather enough that you’re not up to your normal self, without being worthy of a dr visit… this is my go to meal. This says comfort to me. I made tomato basil soup. I love to top it off (once it’s in my dish) with a little shredded cheese and some “croutons” (or gluten free protons as the bag calls them- I got a bunch from my in laws, nacho chili cheese, and they went perfectly!). Along with, of course, grilled cheese. If I’m just feeling a little down, I may add chicken, or some spinach, or do a specialty cheese (or even better- a spicy cheese!). But because I’m not feeling up to snuff, just generic, plain, old grilled cheese. My kids thought this was the best meal ever, and hubby didn’t seem to complain either! Win-win! So today’s impressively simple recipe is just that, it’s impressive in the fact that it never fails to make me feel better, if even momentarily.

Maybe you’re not sick, but you’ve had a long, stressful day… so go ahead and make whatever feels best to you! And I would love to know what your “pick me up” meal of choice is!

2 Comments »

Impressively Simple Thursday


So…I’ve done an “Impressively Simple” post before, and love to make and create meals that look and/or sound difficult, but are really easy. So, I’ve decided (and hoping to stick to!) doing an “Impressively Simple” recipe every Thursday. We’ll see how it works out. But seriously, who doesn’t want to have a repertoire of recipes that they can throw together for the surprise guests or unplanned get together that is sure to impress!?

This week is Chicken Cordon Bleu. I saw a recipe in a magazine and thought, that looks so good, but it sounds like a lot of work… which to me sounded just like a challenge! So I made it about 4 times, 4 different ways. Trying to find the best, the easiest, and the impressivest! (Yes, I am aware that’s not an actual word, but let’s just go with it ok, just this once!)

My first attempt was traditional. My second attempt was spicy. My 3rd attempt was easy. And my 4th attempt was impressive. They were all delicious.

Ok so… here’s the best that I came up with:

Usually it’s one whole chicken breast (plus everything inside) for each person, which is a whole lot of chicken…. so I butterflied it (as best I could), cut it into three strips, and made it so that it had the look of an appitizer, but the taste (and stomach filling powers) of a huge meal.

So…here’s what I feel is the easiest, easily impressive way to make chicken cordon bleu:

4 chicken breasts, cut in half length wise (so it’s like you butterflied it- kitchen scissors will do the trick) and hammer flat and even- I used a rolling pin to do this). Cut into 2 or 3 long (1 1/2  inch width) strips (depending on size of the breast)

Place one slice of cheese (I used the spicy cheddar I’d used previously, I used swiss, and I also used just plain cheddar, because it’s what I had… all of them were good. I vote you pick out your favorite cheese and use that -I’m always going to vote for using what you already have!)

Lay a slice of ham (I also used prosciutto -because I love it- and that was really wonderful!) over the cheese and roll tightly.

You could secure it with a toothpick, but I found that it wasn’t necessary if you rolled them tightly.

*This part is optional* dip rolled chicken in egg. It just helps the next step to stick the chicken.

I dipped them in 1 1/2-2 cups of almond flour that I seasoned with seasoning salt and pepper. (If you are not a GF household, you can also use breadcrumbs, as it traditionally calls for)

Place in greased pan (with the seam on the bottom)  and top each with some shredded cheese (I used a shredded asiago/parm blend)

bake @ 350 degrees for 35 minutes. And viola mini chicken cordon bleu! In healthier portion sizes! Use as appetizers or as the entree! I made it a combination of both! Once as the main entree (in whole chicken breast form… so stuffing, which is why I thought about making the portions smaller…) and then when I made the smaller rolls, I served 2 rolls over broccoli and rice. Very good!

Variation: This adds time, but it was really good, so I’m going to throw this out there, just in case you want to go above and beyond: Before placing the cheese and ham on your chicken, drizzle each chicken slice with some hollandaise sauce. (here’s the recipe for that I used) I had all the ingredients to just make it (And I wanted to start out my chicken cordon bleu process by starting with the fanciest version I could and work my way from there), but they sell packets for easy hollandaise sauce at your local grocer and that will work too. Just before baking drizzle remaining sauce over the rolled chicken. I would highly recommend trying it with the sauce. So yummy. I’m not sure if that’s traditional or not, but I read a lovely blog where he tried it, and figured I’d give it a go- well worth it!

Leave a comment »

I Was Feelin’ Saucy


So I went to a cousin’s graduation party over the weekend, and my aunt sent me home with TONS of food!! So yesterday as I was looking through all the leftovers and trying to decide what kind of meal I could make with it- and really not wanting to have to go to the store… I had a gallon bag full of veggies (broccoli, carrots, cherry tomatoes, peppers, and celery) but no meat. Suddenly, I remember that when I was separating chicken to put in the freezer, one of the bags had been leaking so I’d rewrapped it it another bag…which meant I did have chicken after all. So I decided on a stir fry. I should mention that this was what I wanted because I was sent home from some BWW (Buffalo Wild Wings) sauce that I thought would be perfect for a stir fry!

So I cut up the chicken in stir-fryable pieces, threw them in the pan, and then realized I’d forgotten the container of sauce on my Auntie’s counter! Shoot! I was so disappointed. And I knew that I’d just thrown out the last of our very expired teriyaki sauce last week when I cleaned the fridge out! So just when I was contemplating running to the store after all (or more likely, sending hubbyman to the store)…I thought I’d just look up some stir fry sauces and see if I could happen to have the ingredients. Turns out, I didn’t. But I had similar ingredients. It turned out AMAZING. Hubby was so impressed!! He even asked that I make it in bulk and freeze so that it can be used again and again! I’d call it a success!!

So as I cooked the chicken, I got out all the veggies (leaving out the celery) out, and began to throw together the sauce. True to my normal form, I don’t have exact measurements for you, but hopefully close enough! And it’s all about taste anyways! So if you like more of one ingredient, and less of another- do that!

4 chicken breasts cut into strips

as much and many veggies as you want (I did throw the tomatoes in, but not until the very end)

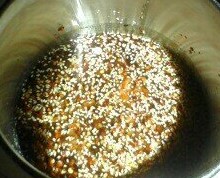
sauce: 3/4 cup soy sauce (our favorite brand just went gluten free! so exciting!!), 1/2 cup sunflower oil (you could use olive oil, or if you had some- sesame oil would be perfect), 2 1/2 tsp (ish) ginger (I may have used a little more, but I like ginger), minced garlic (about 1/4 tbs), some toasted sesame seeds, and some crushed red pepper (maybe a little too much but it just swooshed on out of the jar), about 1/2 cup of brown sugar and maybe a tbs or two of honey (because that’s all I had.) Oh yeah, and a couple pinches of corn starch to thicken it up. See, I told you it’s not exact, but it was good… maybe next time I’ll get specifics.  I also took pictures, but for some reason they’re not wanting to upload…so I’ll have to add them as soon as they do! Ok, so still can’t find my camera (boo!), so I had to use my phone…so they’re small and not great quality, but they’re there, so there you have it!

I may have had some swooshing out of the toasted sesame seeds as well...


It looks like we’re going to have our first sunny day in weeks today! So I’m hoping to get out and enjoy it!!

Leave a comment »

Impressively simple


So this is quickly becoming a favorite, at least for me… or I see it becoming a favorite is probably a better term because I have only actually made this twice, but it is so yummy!

It’s pretty much the same chicken recipe that I used here With a few new twists. I found that this chicken is both delicious and easy. And since we also have guests this week it’s a good meal to make if you want to impress with your culinary skills and stick to a time limit and a budget! I think this would also be good served over rice (or quinoa), but I wasn’t sure when I made it, so I skipped that part. Next time, I think I’ll add rice. This time I used a ton of chicken (I figured it would be a crazy week so I cooked up between 6-8 (I can’t remember which now!) chicken breasts that I’d cut into strips. After cooking through I took out about 1/3 of the chicken to save for future meals. If I were only cooking the amount for this dish I would have cooked the “mix ins” along with it. The “mix ins” were one yellow onion, about 2+ cups of fresh spinach, about 2/3 cup of fresh chopped mango, about 1 cup of Trader Joe’s tomato-less salsa (a corn and chili salsa- so, so yummy!) with a few drizzles of olive oil. I did this in a pan along side the chicken.

.

Once I removed the chicken to save for the rest of the week, I added in the “mix ins,” cooking over a low heat while stirring frequently, for about 3 minutes. I also realized at this point that I’d forgotten to cook the chicken in lime, so I squeezed some extra lime juice in the mix. Voila! 20 minutes and dinner was done! And delicious!

See, wouldn’t this look terrific on top of rice?

So good, so easy, sooo… go make it!

Leave a comment »